Graph Drawing Tool With Graph
How to draw perspective
Learning how to draw perspective right could alteration your entire drawing process. Whether drafting traditionally with pencil and theme, or digitally victimisation a graphics pad, I still concept even the most complex scenes entirely using the draughting techniques of the sensible horizon line and vanishing points that most people volition sustain learnt in art class.
This mightiness seem strangely over-complicated, when IT's so hands-down to quickly mock up a basic version of the scene using 3D modelling programs to guide on your drawing, but when you fixed out a linear perspective drawing by paw, you give yourself some flexibility in interpreting the method. In undermentioned and often slightly bend these rules, you enrich the narrative composition of the image by adding depth, play and atmosphere. Hera are some of the methods that I use about frequently, including unrivaled-sharpen perspective and two-point view.
Also read our steer to the art techniques you postulate to know, and our roundup of the best how to draw tutorials.
Click on the top conservative-hand quoin of apiece image to enlarge IT.
01. Place the horizon line of credit
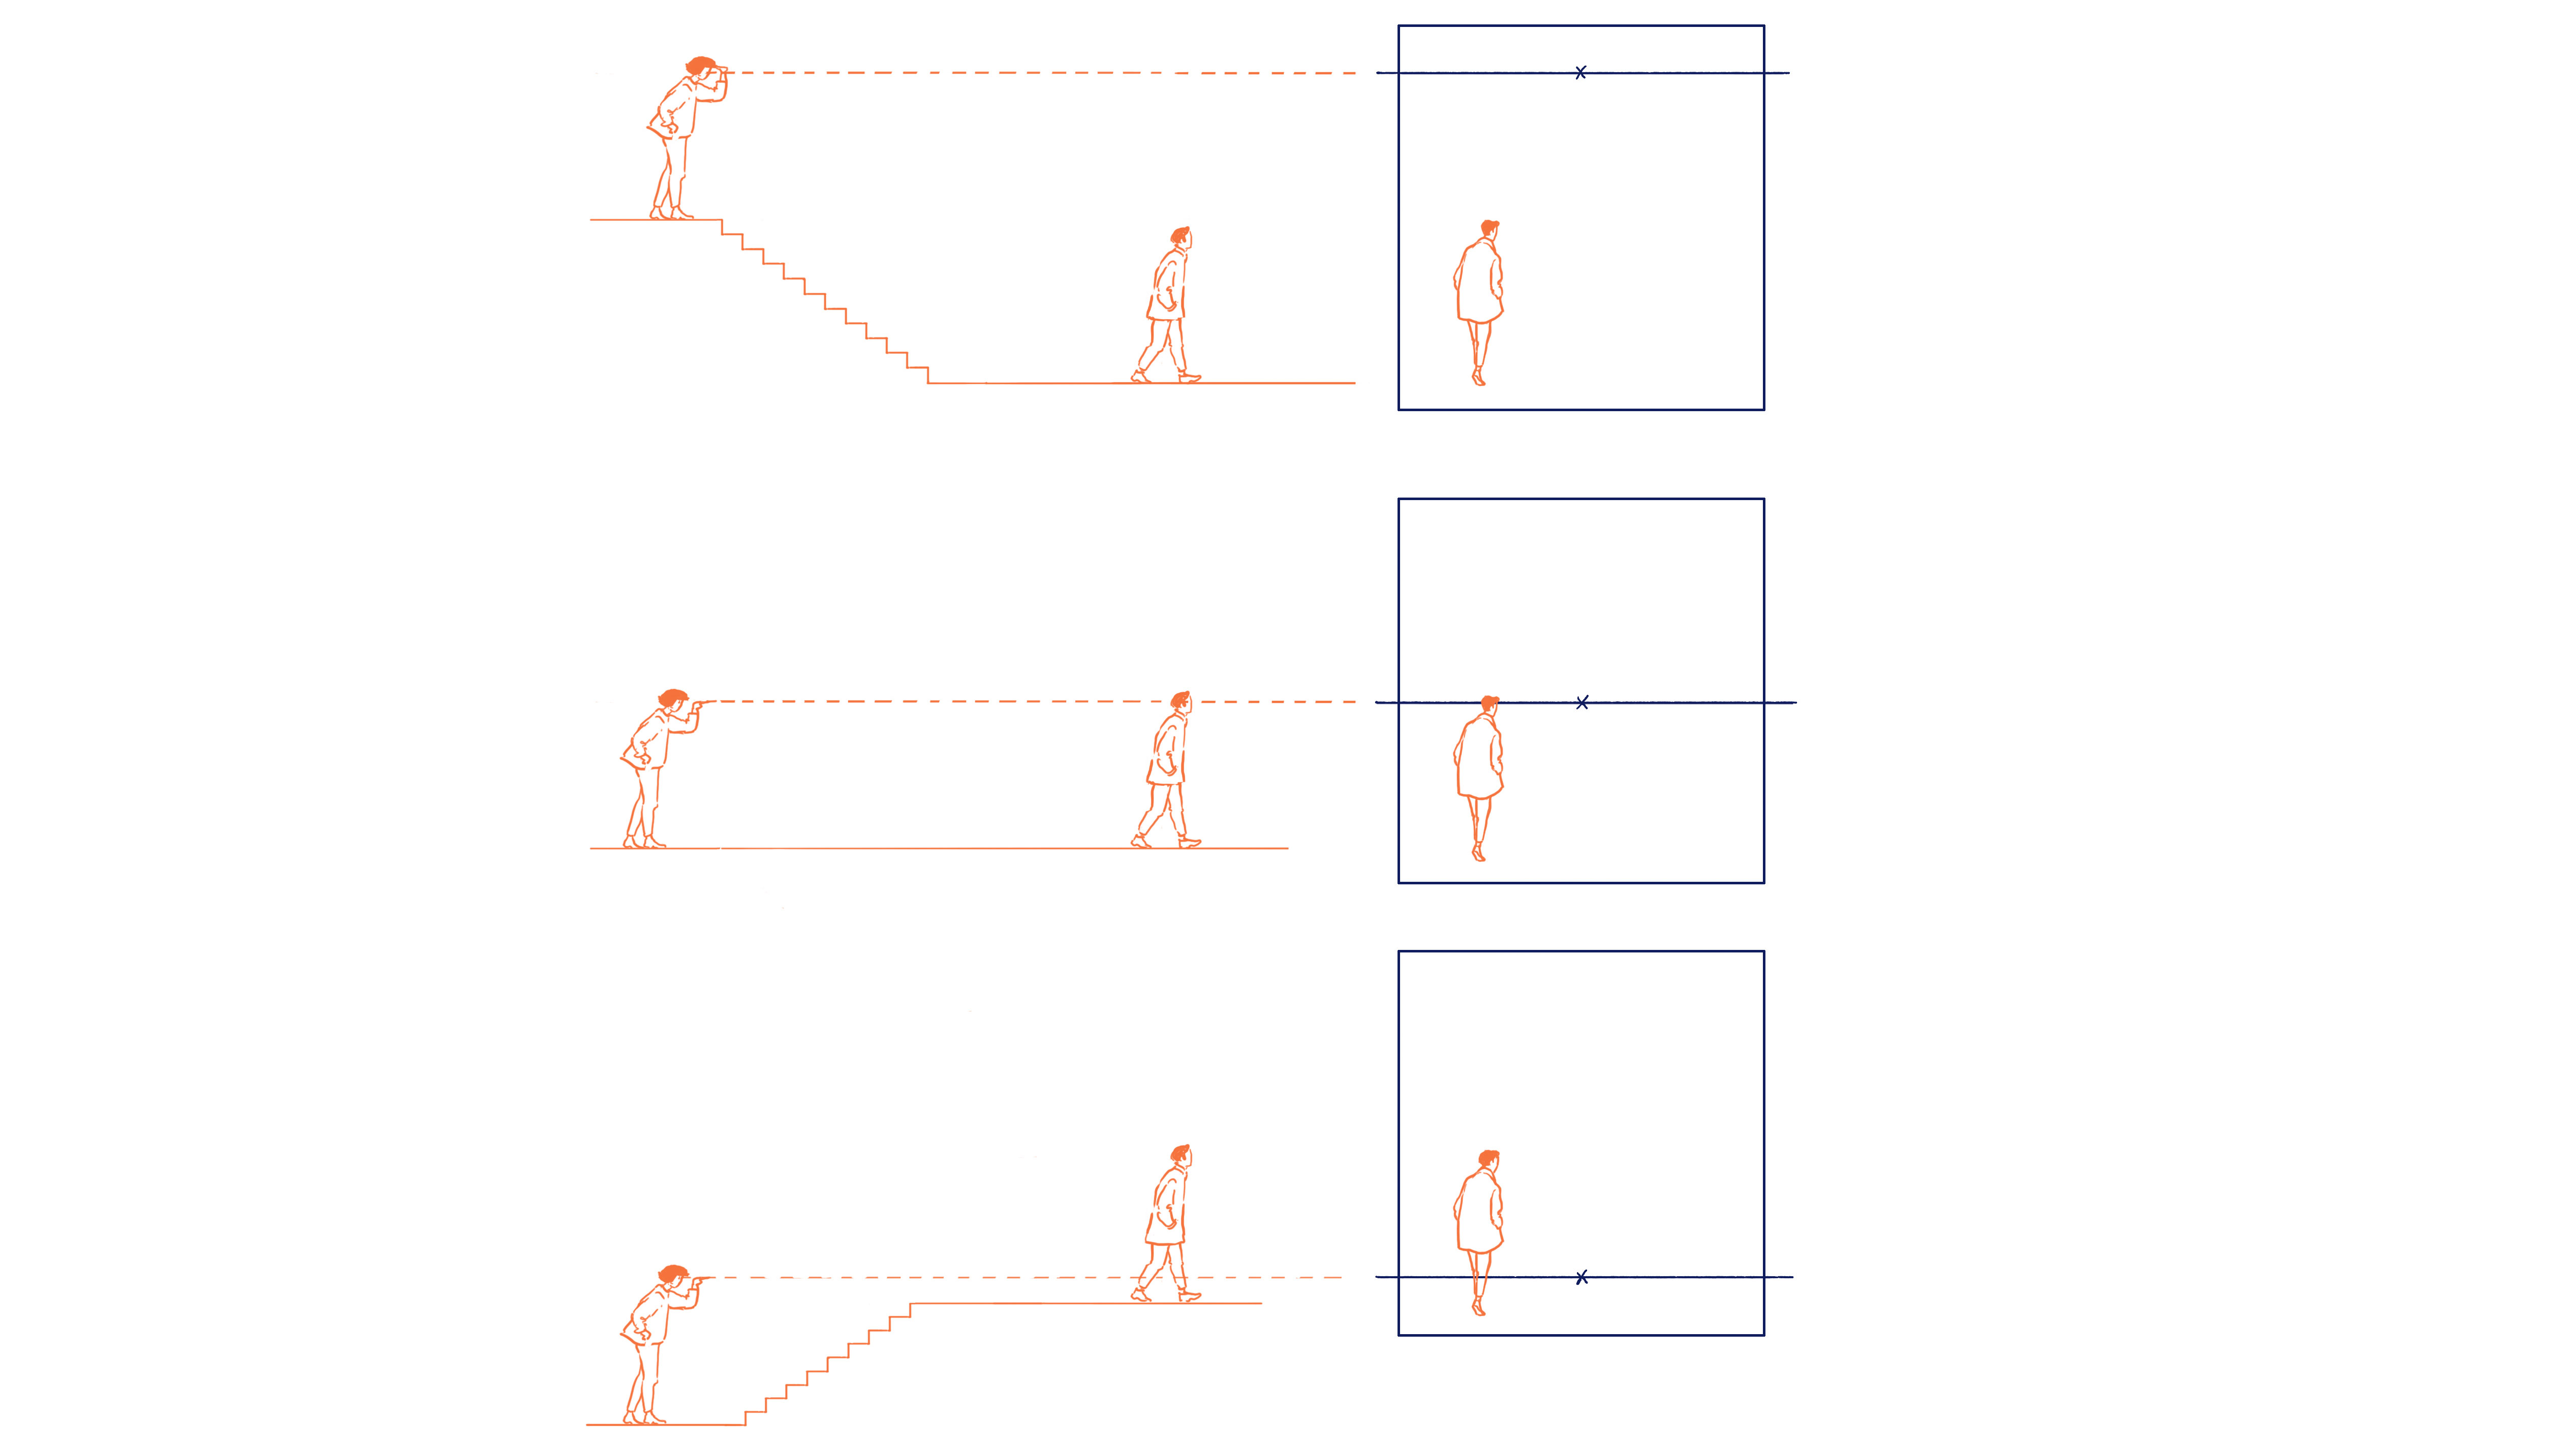
(Project: © Anna Grind)
The most important decisiveness is the placement of the horizon line in sex act to the immodest characters and elements such as objects, article of furniture or buildings in the scenery. It's useful to recall that the horizon is on the same level as the imagined eye of the viewer.
When you place the horizon line above the characters, IT gives the looke the impression that they're in a set in a higher place, looking down from a platform, say. If we suppose that our viewer is standing on the same airfoil as the other characters in the panoram, and so all standing figures in the prospect testament also have their head on the horizon trace, with the exception of in particular tall or short circuit characters.
If the horizon line is low-spirited, and the characters stretch high higher up the view, and then it appears as if the viewer is lying down on the same surface, or regular on a lower chopine looking up. In my graphic art novel Honest Eyes I would often set the horizon line either very low or identical shrilling in the drawing. It seemed to fit with the flavor of the book, in which the main character is often confused and unoriented by surroundings that either loom above her or stretch departed in inhumanly vast vistas.
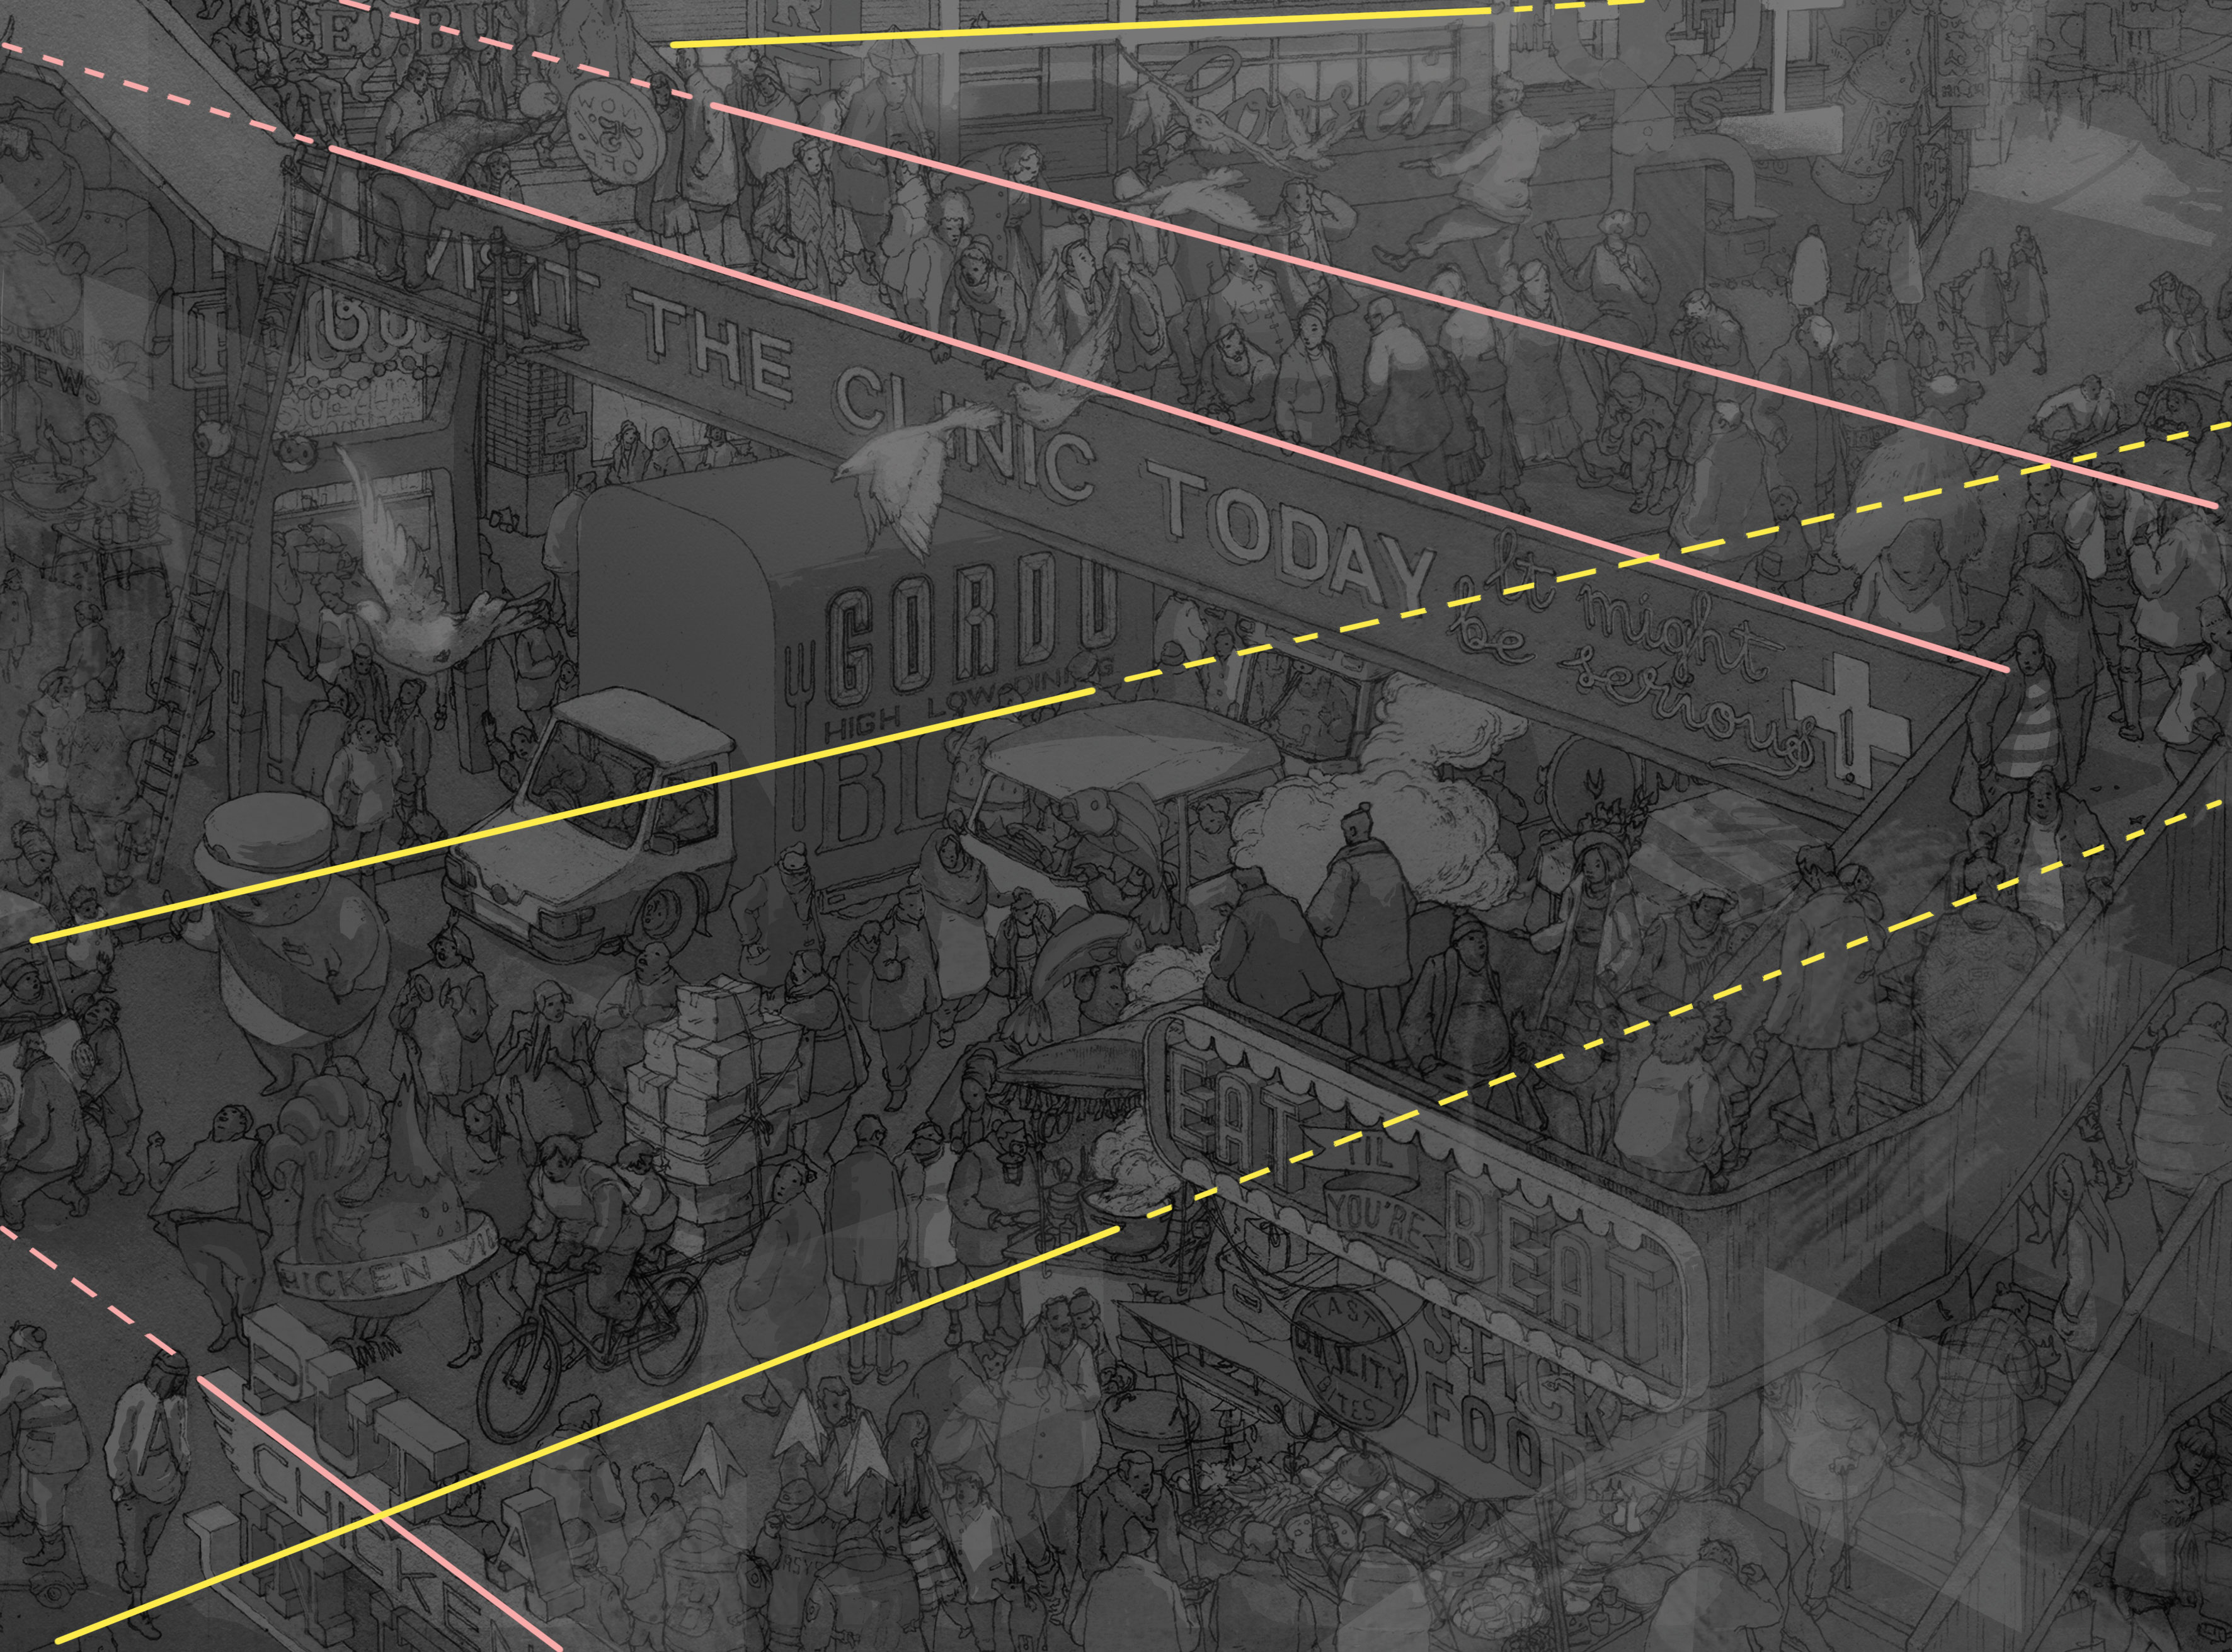
02. Utilise one-point perspective
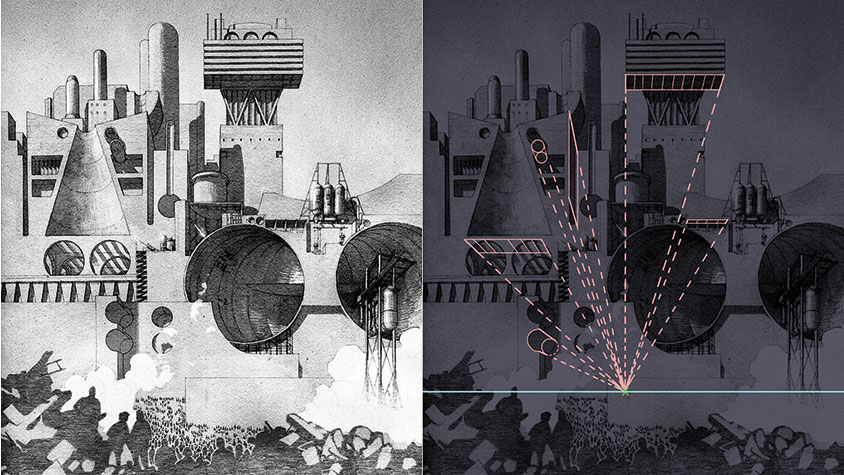
(Figure: © Anna Mill)
The supra image shows extraordinary-point perspective with the sensible horizon run along placed David Low in the frame, but level with the figures to show them being dwarfed by the buildings.
In one-point perspective, horizontal lines on any level orthogonal to the point of view will retreat to a vanishing point that's placed somewhere on the horizon line. Normally, I avoid putt the vanishing point right in the middle of the blank space that I'm drawing, because it tends to create too untold isotropy in the view, making the typography feel static and a lesser unnatural. Yet sometimes this supernatural calm can add to the atm of the tantrum.
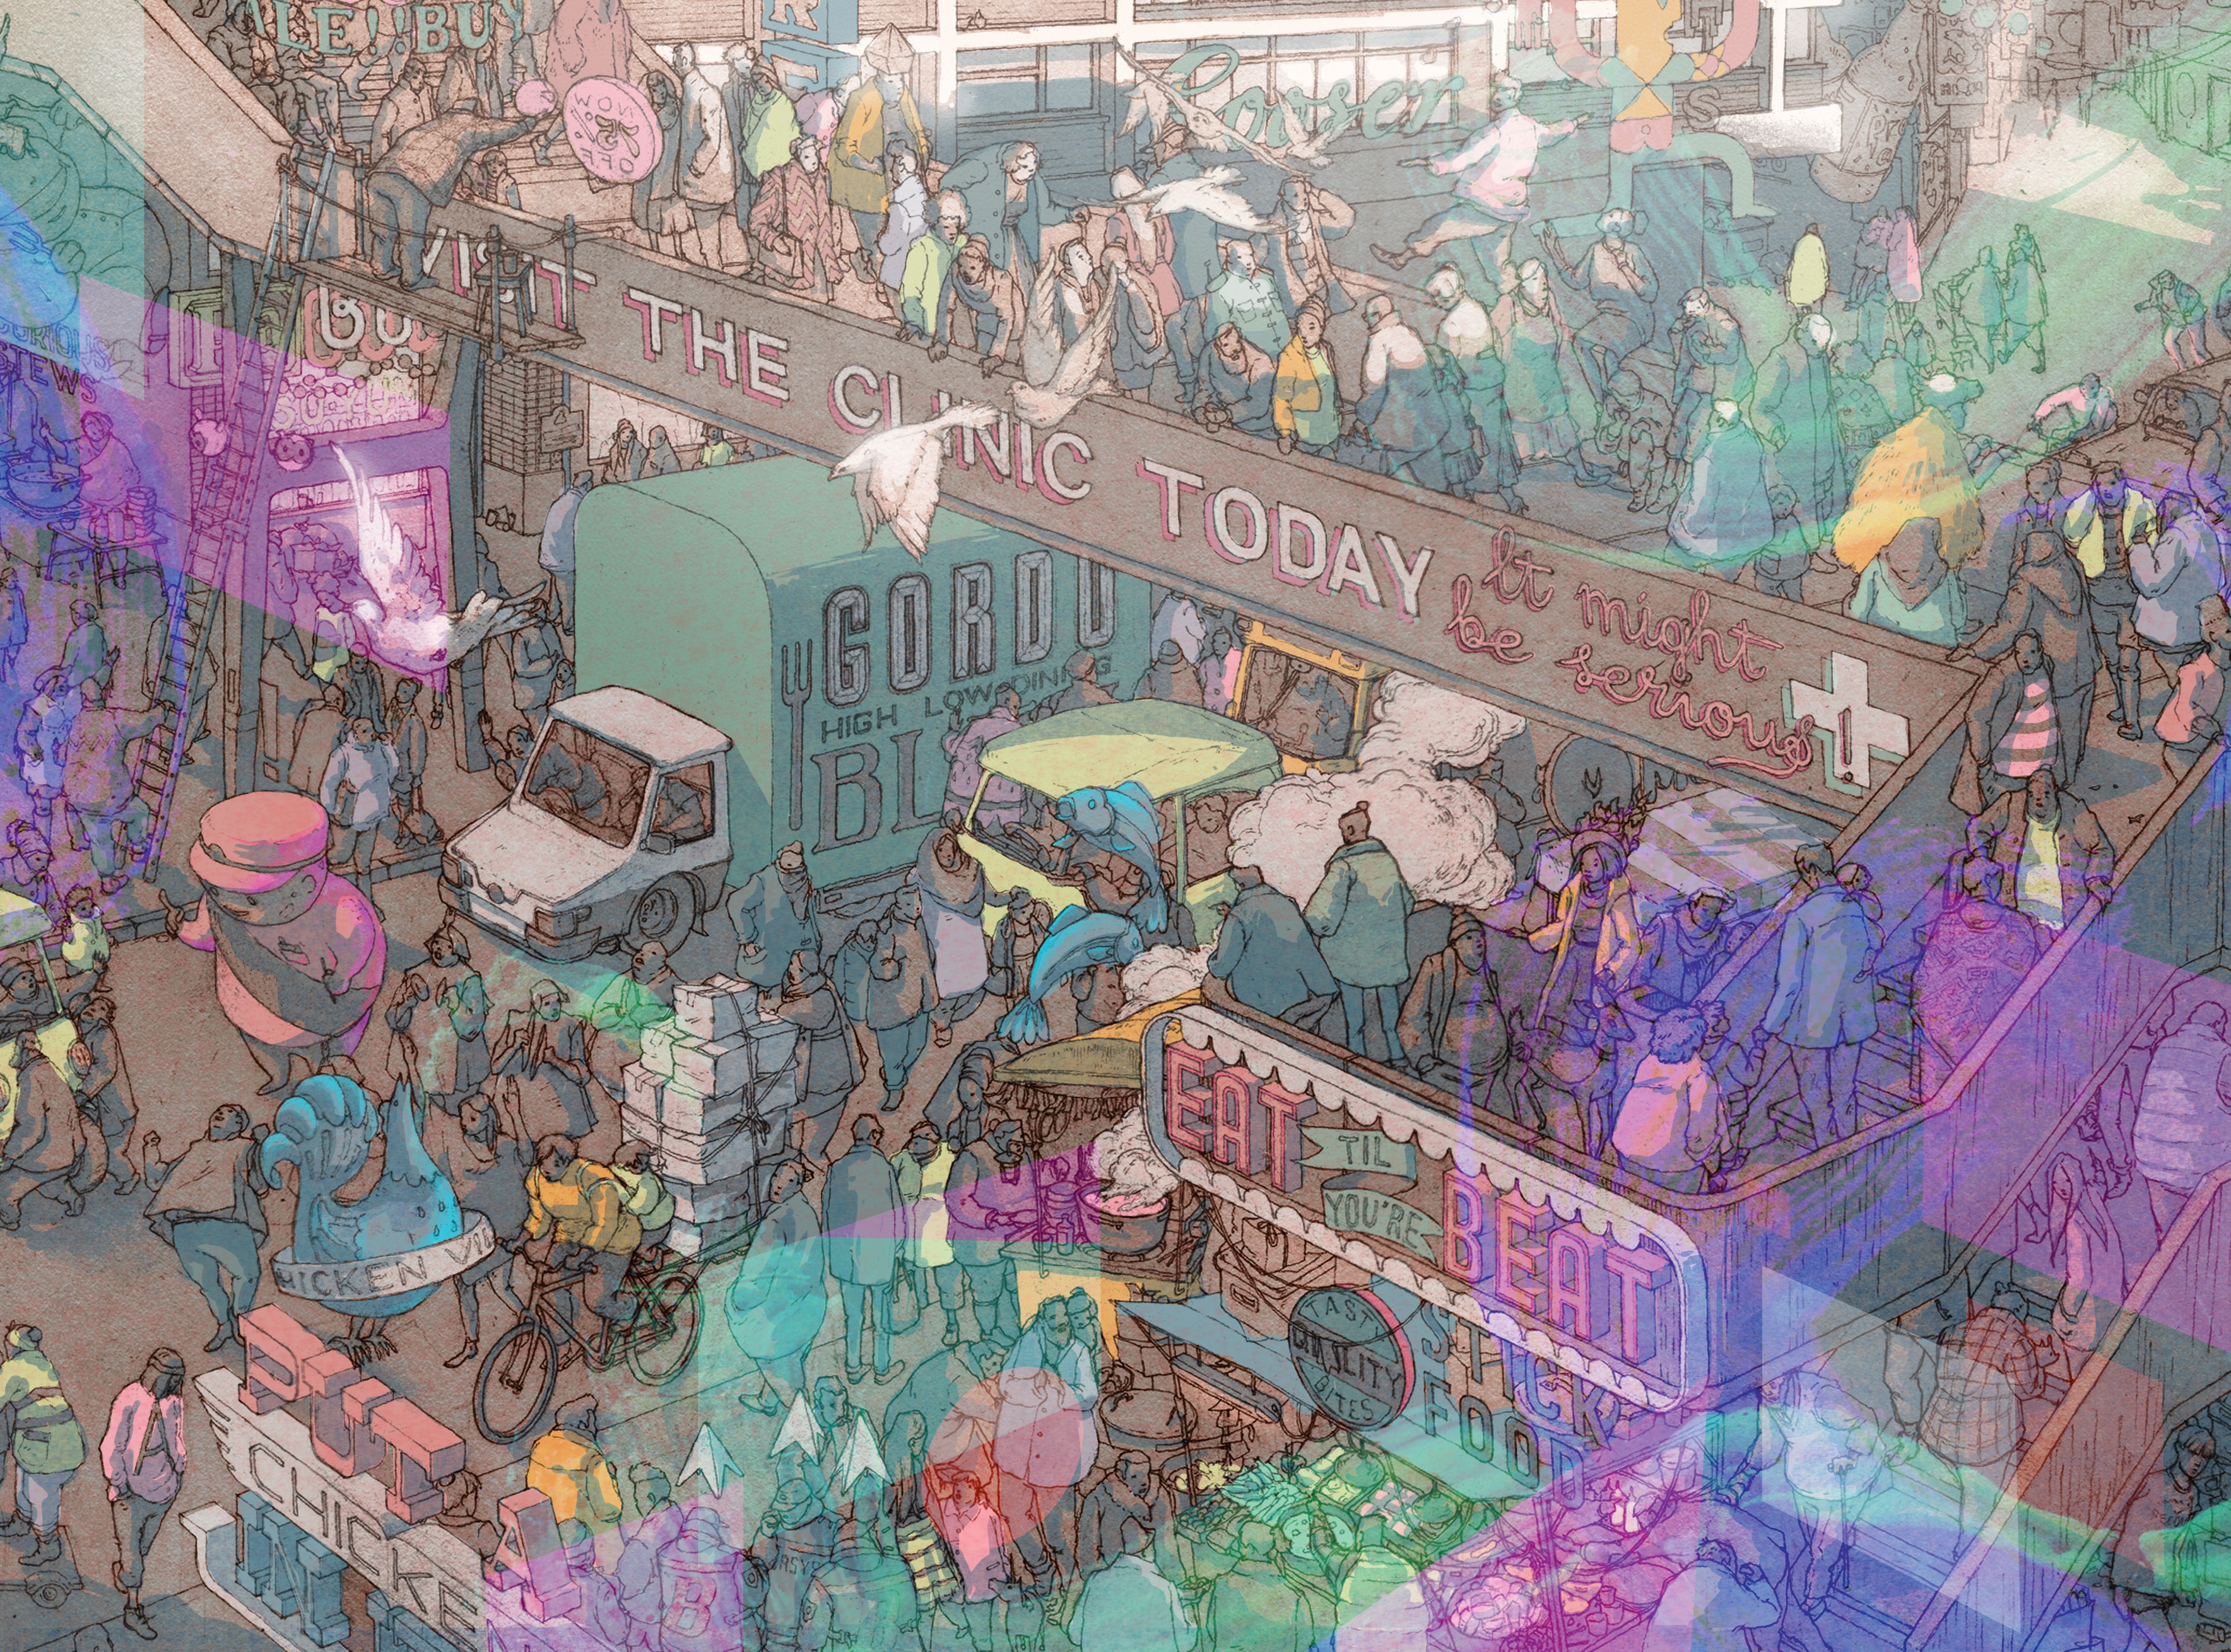
03. Create two-point perspective
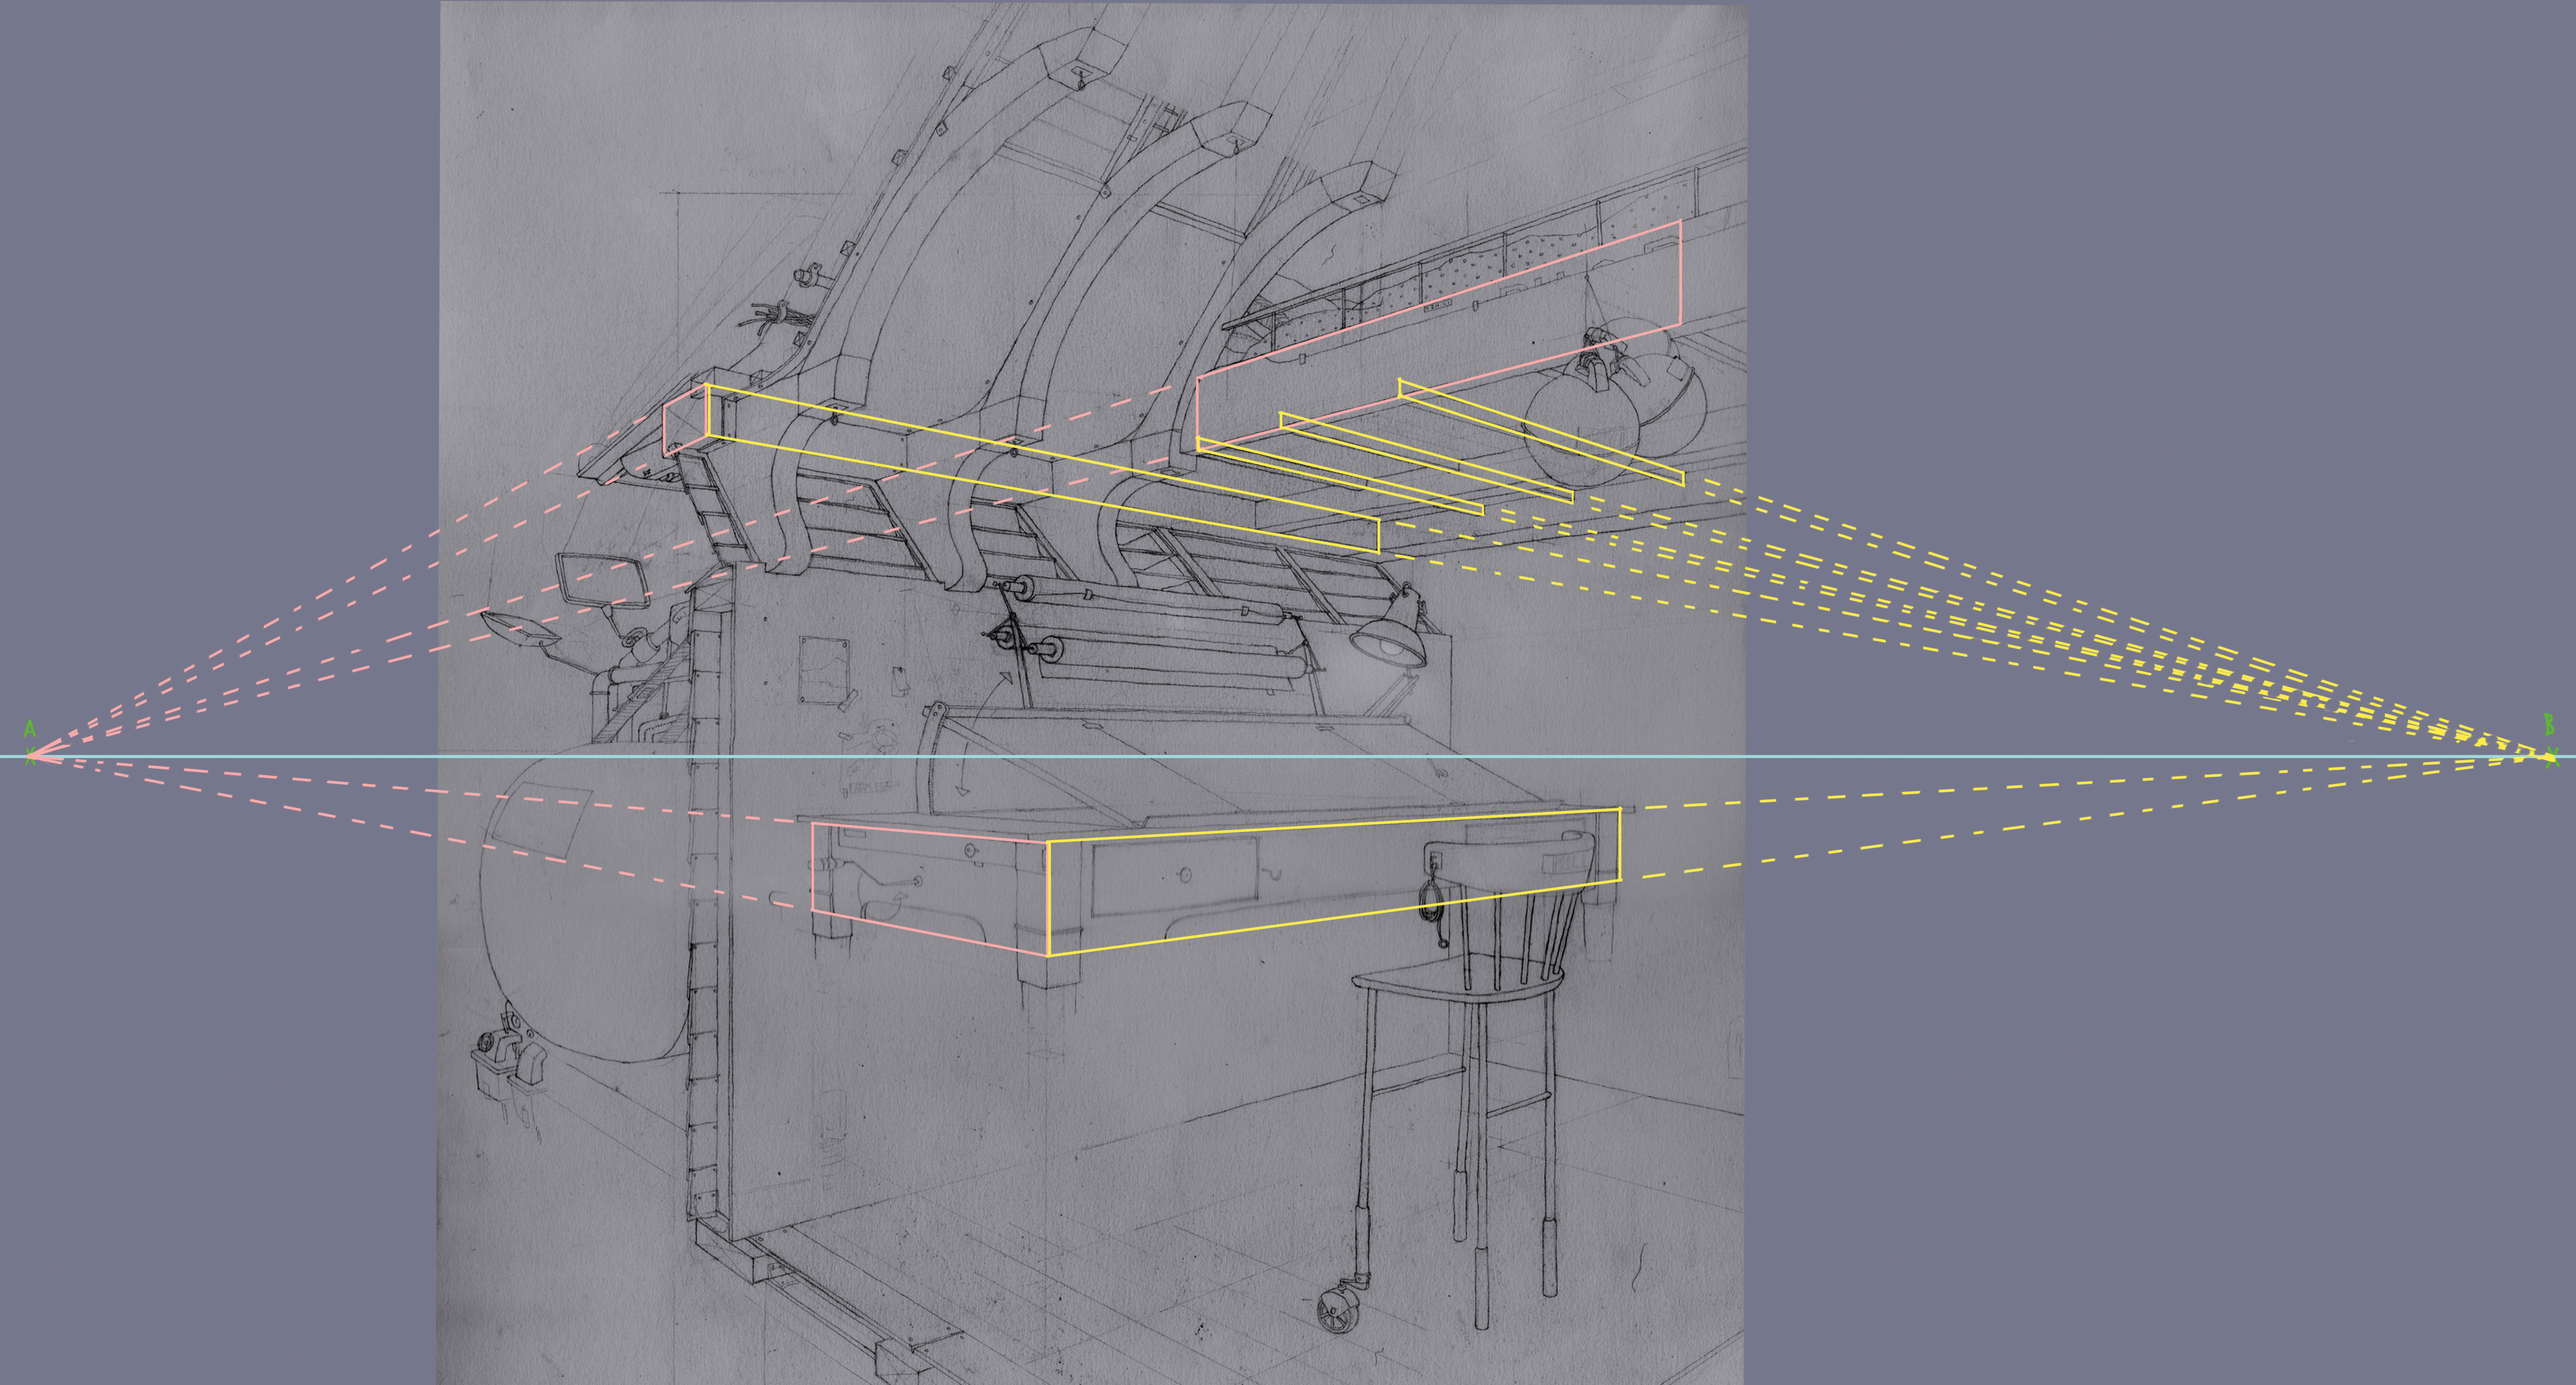
(Paradigm: © Anna Mill)
With this lesson of two-point perspective, both vanishing points are out of frame and the horizon line is centred happening the image, giving a natural, low-tension feeling to the scene.
When drawing two-betoken perspective, I always spot either one operating room both of my vanishing points outside the edges of the drawing. I find that when some the leftist and right disappearing points are inside the frame, dramatic perspective angles are created. This sometimes generates objects that look away oddly stretched. For the most piece withal, I want a more natural field of view, so I take precaution to locate the disappearing points in such a style that they create a good balance between drama and realism.
04. Up your skill using analogue tools
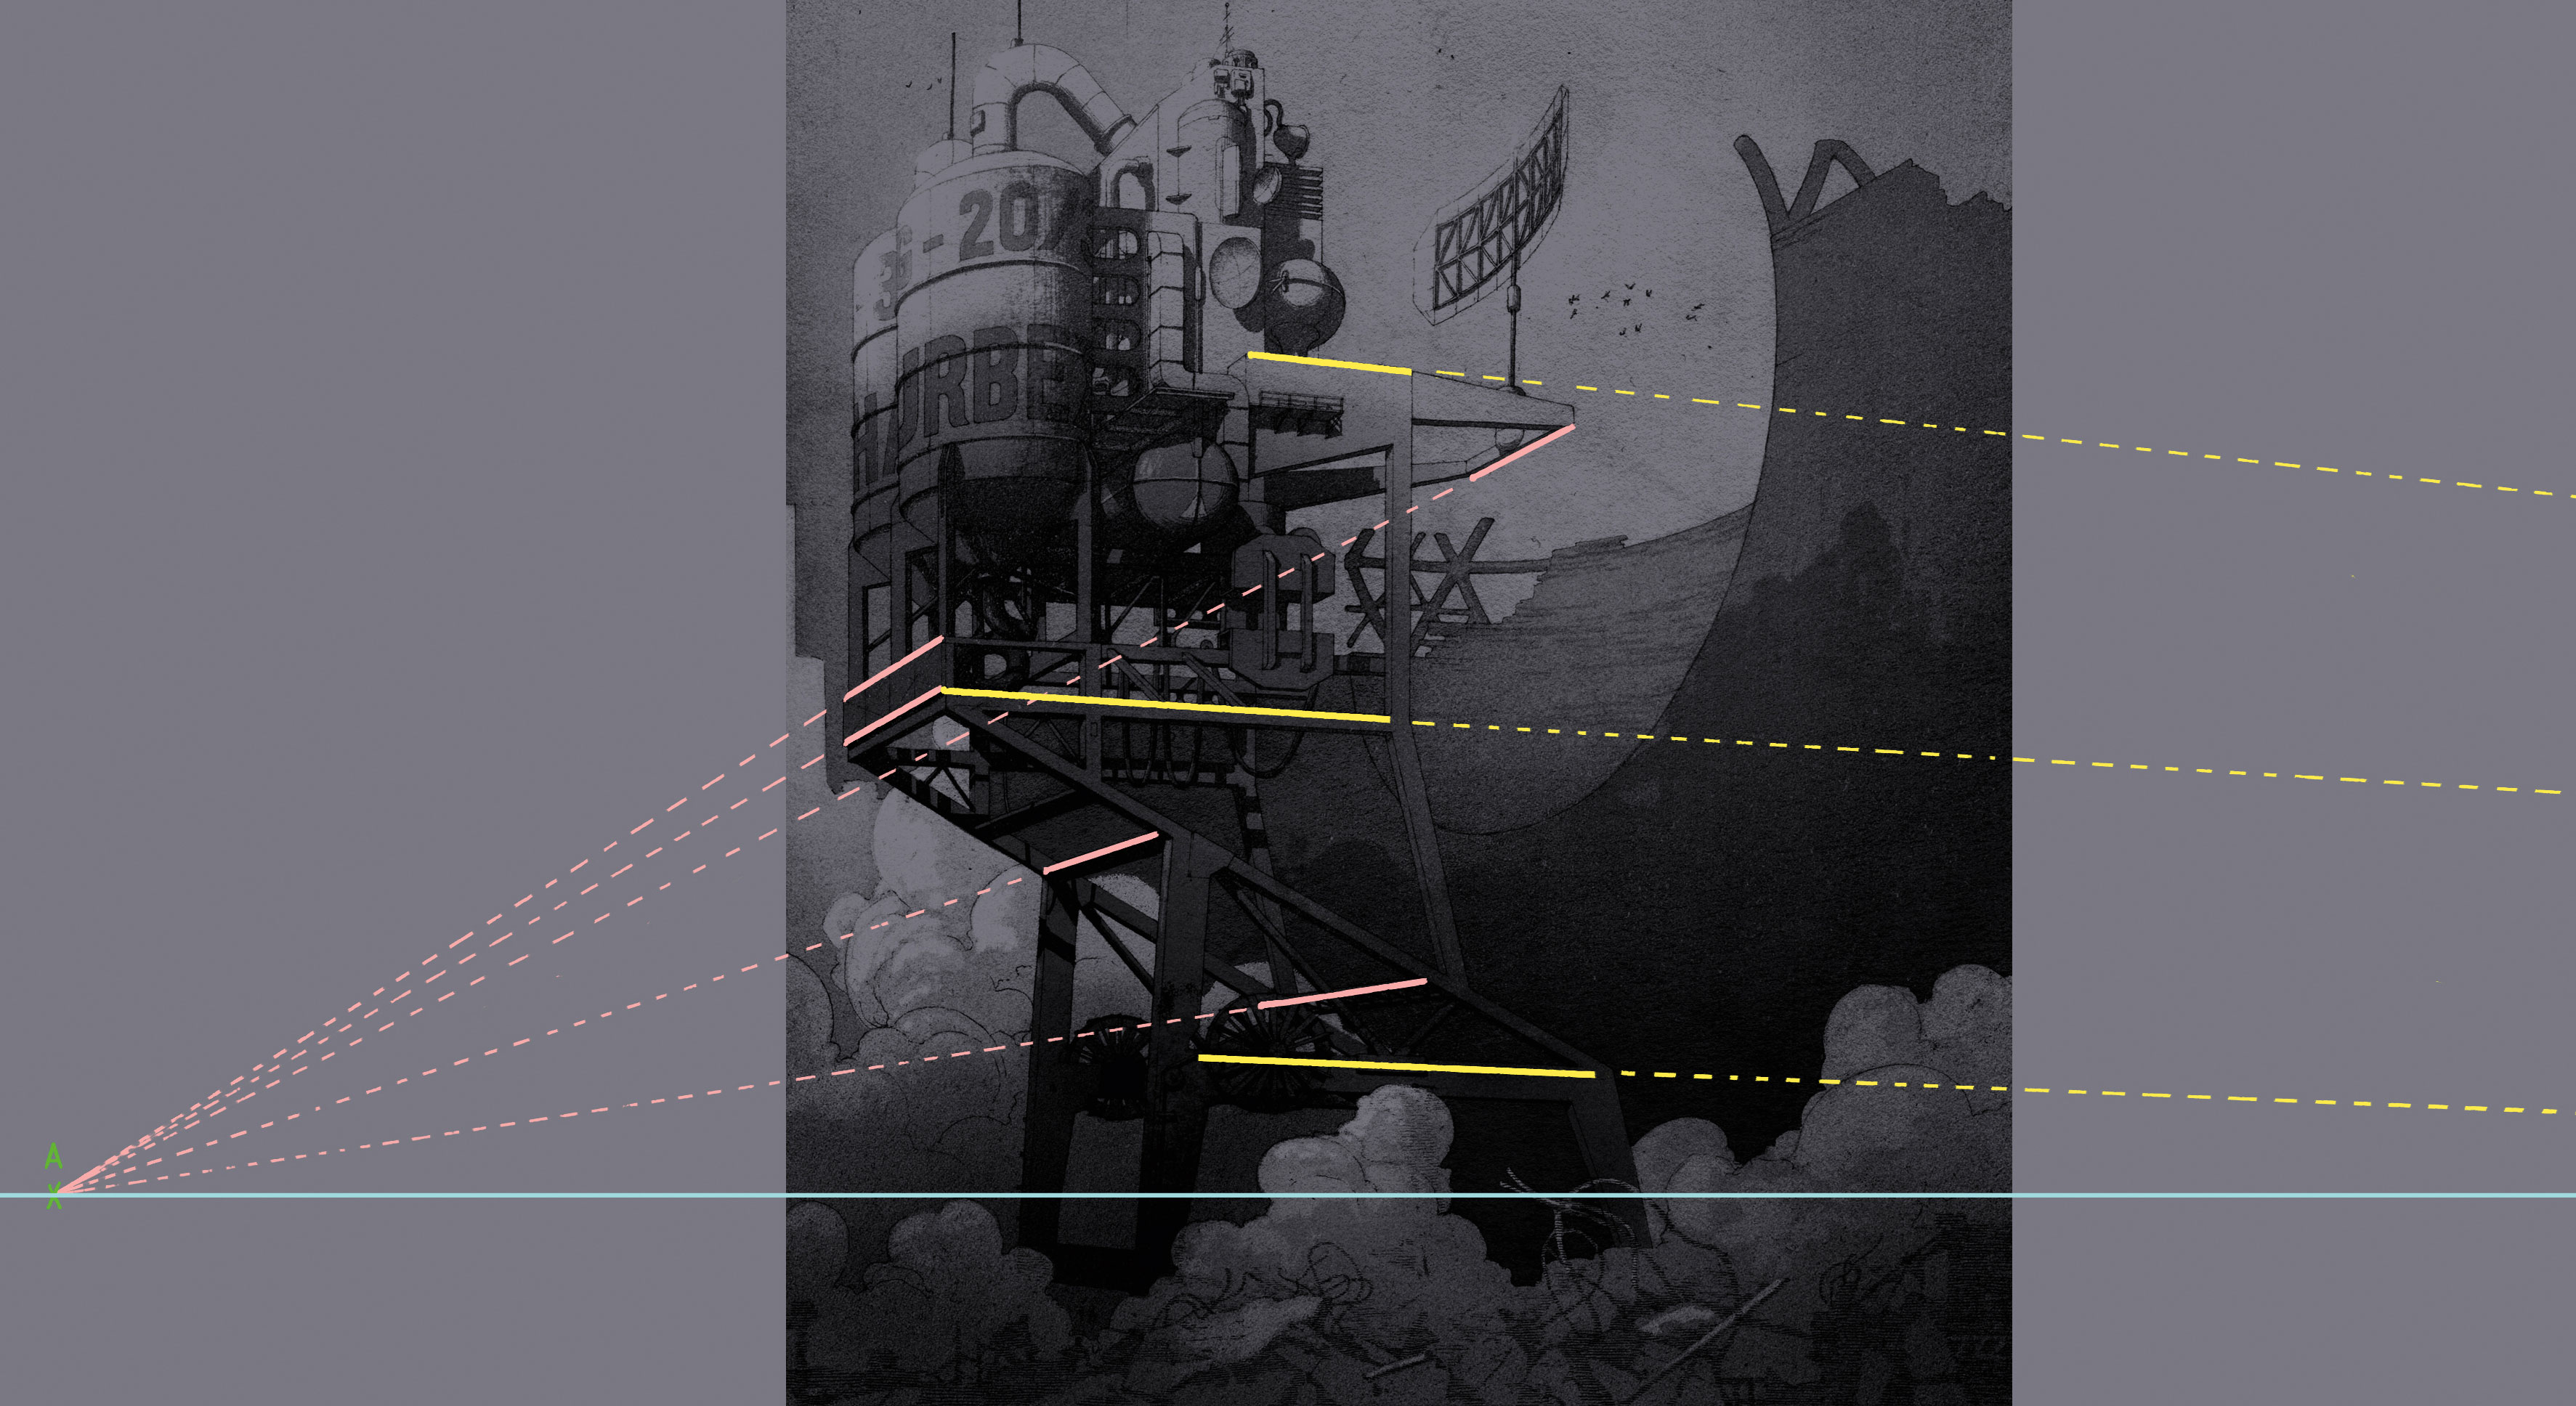
(Image: © Anna Mill)
I have various sets of rulers of my own making that I use when carrying out traditional paper and pencil perspective lottery. The simplest ones are cut from mount board and pivot on a drawing flag that acts American Samoa the disappearing point. This enables Maine to quickly move the rule around the page, and know that any agate line that I draw against the draughting inch will recede to it disappearing point. This can be set up with as many rulers and vanishing points as is required, but typically I entirely use unmatched or 2 at once.
The image supra shows two-point position with a alto skyline line and vanishing point FAR right out of the frame to enhance the feeling of outstrip and scurf. It's not always possible to have a ruler long enough Oregon table wide-cut enough to earmark your ruler to be physically connected to the vanishing point. What's needed is a ruler that volition faithfully pivot about a dot to which information technology's not really connected. This was an enjoyably tricky problem that I grappled with for many years, before at last coming up with a solution that involved fixing iii rulers together, which moved around ii drawing pins.
05. Dive into digital tools
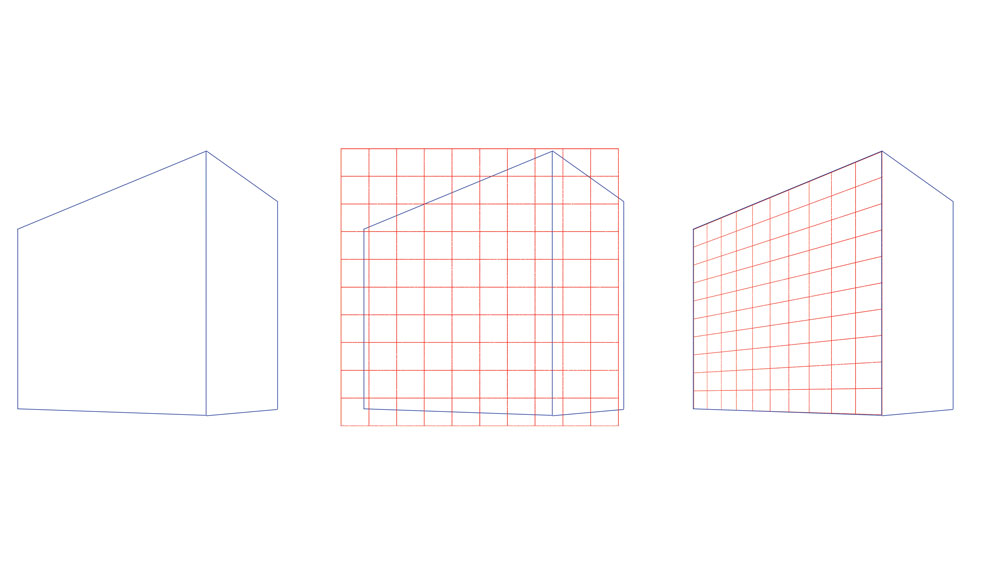
(Trope: © Anna Mill)
When drawing digitally in Photoshop, I find that it's normally too cumbersome to expand the analyze to draw all the perspective lines recession to a vanishing point to the left or opportune outside the scene. In this case I tend to add a standard square power system for guidance, which I adjust to the main perspective lines using the computer program's Skew tool around (Edit > Free Transform > Inclined). This usually provides enough guidance that more elaborate lines can be haggard by eye, plane if they don't fall exactly on a gridline.
Drawing digitally also allows for some other timesaving shortcuts, particularly when drawing repetition elements in position, such as a edifice that has many windows of the same size and shape. Hither's my method for depicting repeating elements. First, draw unmatchable windowpane and save the file, career it 'Single Window'. Adjacent, create a new document, go to File > Place Linked... and choose your Single Windowpane file. Add as many multiples of the window as you need, arranging them to suit the window dressing of the building that you are drawing. Then lay aside the file as 'Facade 1'.
Now create a new written document, and Place Linked file cabinet Facade 1. You give the sack now skew the frontage to the perspective that you need, without having to draw every the Windows individually. In addition, if you make a change to your Single Window data file, then all the copies will besides update in the perspective sight. Finally, link the facade file and skewed to become the position in the scene.
05. Embrace your errors
(Image: © Anna Milling machinery)
IT's only if some inordinately complex shape is required that I ever use 3D model software to help generate the image. This is partly from a stubborn transport in a technological drawing gainsay, but also because apart from the flexibility it gives you, information technology also allows for some mistakes. I feeling IT's in these olive-sized errors we progress to when we craft something by hand that some of our personality shows through in the work.
I feel like my inaccuracies are likely specific to me, and that I make the same small mistakes in look-alike ways again and again when drawing. The nearer that a draughtsman gets to robotic perfection, the less face are the signs of a human hand and mind creating those small inaccuracies that are unique to that artist, and I believe that, even if it takes a bit longer, this is something that is worth preserving.
This clause was originally published in issue 301 of Computer Arts magazine. Buy issue 301 .
Study more:
- The essential guide to foreshortening in art
- Google's art app turns you into a masterpiece
- The best pencils for colouring, drawing and sketching
Affine articles
Source: https://www.creativebloq.com/how-to/draw-perspective
0 Response to "Graph Drawing Tool With Graph"
Post a Comment